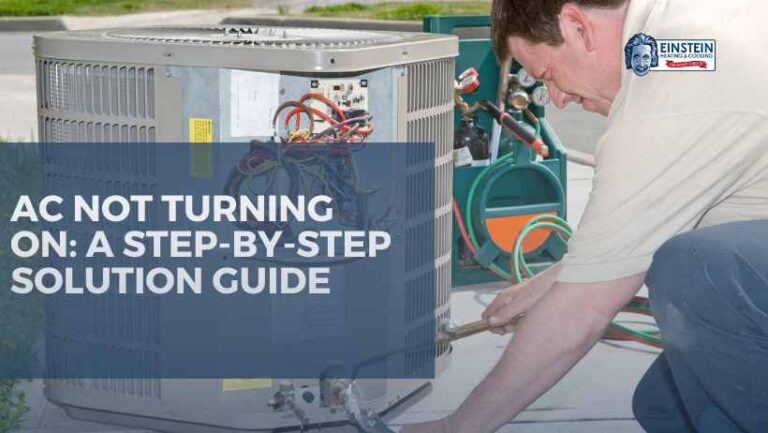
Is your AC unit not turning on on a scorching summer day? A malfunctioning AC unit can be frustrating, but fear not – this comprehensive guide is here to help you diagnose and troubleshoot the issue. Follow the steps outlined below to identify the root cause and potentially get your AC unit up and running again.
Causes of AC Unit Not Turning On
1. Power Supply Issues
If your AC unit is not turning on, the first step is to check the power supply. Several factors could be at play here.
Power Outlet Inspection
- Ensure that the power outlet your AC unit is connected to is functional. Plug in another device or appliance to verify if the outlet is providing power. Make sure that AC maintenance is done properly.
- If the outlet is not working, check the circuit breaker or fuse box. A tripped circuit breaker or blown fuse could be the culprit. Reset the breaker or replace the fuse if needed.
Power Cord Examination
- Inspect the power cord for any visible damage or frayed wires. If you notice any issues, consider replacing the power cord with a new one.
- Ensure that the power cord is securely plugged into both the AC unit and the power outlet.
2. Thermostat Troubles
A malfunctioning thermostat can also prevent your AC unit not turning on. Check the following factors.
Thermostat Settings
- Confirm that the thermostat is set to the desired temperature and cooling mode. Sometimes, incorrect settings can lead to the AC not turning on.
- If your thermostat has batteries, replace them to rule out power-related issues.
Thermostat Calibration
- Check the accuracy of your thermostat by comparing its reading to an accurate thermometer. If there is a significant difference, consider recalibrating the thermostat.
3. Air Filter Obstruction
A clogged or dirty air filter can restrict airflow, causing your AC unit not to work.
Filter Inspection
- Locate the air filter in your AC unit and inspect it for dirt, dust, or debris. A filthy filter can impede airflow and strain the system.
- If the filter is dirty, replace it with a clean one. Regularly changing the filter is crucial for the efficient functioning of your AC unit.
4. Capacitor Concerns
Faulty capacitors can also be a common cause of AC units not turning on.
Capacitor Examination
- Inspect the capacitors in your AC unit for any visible signs of damage, such as bulging or leaking. A damaged capacitor may need to be replaced by a professional.
- Consider checking the capacitor with a multimeter to ensure it is functioning within the recommended range.
5. Electrical Connection Problems
Issues with electrical connections within the AC unit can disrupt its operation.
Wiring Inspection
- Examine the wiring and electrical connections in your AC unit for loose or damaged wires. Secure any loose connections and repair or replace damaged wires.
- If you are not comfortable working with electrical components, it is advisable to seek the assistance of a professional technician.
6. Refrigerant Levels
Inadequate refrigerant levels can prevent the AC unit from cooling effectively and may lead to it not turning on.
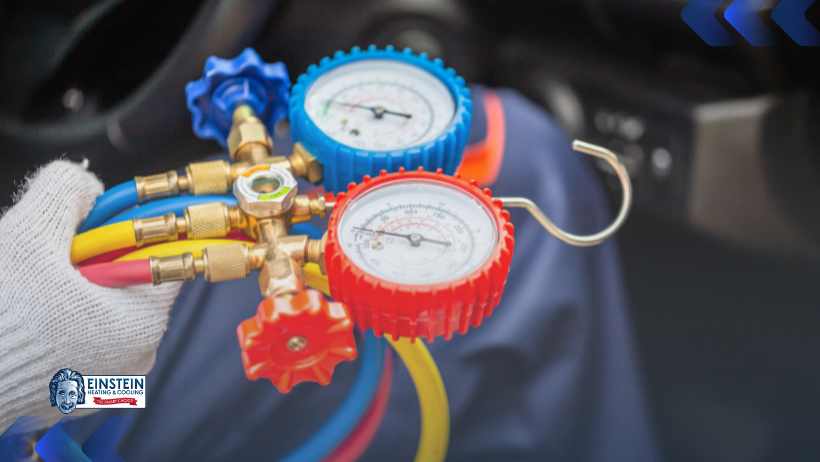
Refrigerant Level Check
- Consult your AC unit’s manual to locate the refrigerant lines. Check for any visible leaks or damage.
- If you suspect low refrigerant levels, contact a licensed HVAC professional to assess and recharge the system.
7. Contactor Issues
The contractor is responsible for allowing electrical current to flow to the compressor and motor. Problems with the contactor can hinder the AC unit from starting.
Contactor Examination
- Inspect the contractor for signs of wear, burning, or pitting. These issues can indicate a faulty contactor that needs replacement.
- Ensure that the contractor is receiving the proper voltage. If not, there may be an issue with the electrical supply.
8. Overheating Concerns
AC units come equipped with safety features to prevent overheating. If the system detects an issue, it may shut down to prevent damage.
Cooling System Inspection
- Check the evaporator and condenser coils for dirt or debris. Over time, the accumulation of dirt can impede the cooling process and lead to overheating.
- Clean the coils using a soft brush or vacuum cleaner. Regular maintenance can prevent overheating issues.
9. Malfunctioning Compressor
The compressor is a critical component that facilitates the circulation of refrigerant. A malfunctioning compressor can result in the AC unit not turning on.
Compressor Evaluation
- Listen for any unusual noises from the compressor when the AC unit is supposed to run. Unusual sounds may indicate a problem that requires professional attention.
- If the compressor is not functioning, it may need to be replaced. Compressor issues are typically complex and should be addressed by a qualified technician.
10. Sensor Problems
Modern AC units are equipped with various sensors to monitor conditions and ensure optimal performance.
Sensor Calibration
- Check for any sensors in your AC unit and ensure they are clean and free from obstructions.
- Some sensors may need calibration if they are not providing accurate readings. Consult your AC unit’s manual for calibration instructions.
11. Ductwork Damages
Undetected issues in the ductwork can also contribute to your AC unit’s failure to turn on.
Duct Inspection
- Examine the ductwork for any visible damage, leaks, or disconnected sections. Damaged ducts can compromise the efficiency of the cooling system.
- Seal any leaks with duct tape or contact a professional for more extensive repairs. Properly sealed ducts ensure that cool air reaches every room in your home.
12. Remote Control or Panel Malfunctions
In the case of modern AC units with remote controls or digital panels, malfunctions in these components can prevent the system from starting. AC not turning on can be caused by malfunctioning remote controls.
Remote/Panel Examination
- Check the batteries in your remote control or panel. Weak or dead batteries can prevent signals from reaching the AC unit.
- If using a remote control, ensure there are no obstacles between it and the AC unit. Direct line-of-sight is essential for proper communication.
13. Time Delay Setting
Some AC units have a time delay feature to prevent frequent cycling. If this feature is active, the unit may not turn on immediately after being powered.
Time Delay Adjustment
- Consult your AC unit’s manual to understand if it has a time delay setting and how to adjust it.
- Allow some time (usually a few minutes) after turning on the AC before expecting it to start. The time delay ensures the compressor isn’t overloaded with frequent starts.
14. Tripped Safety Switch
AC units are equipped with safety switches that trip in case of abnormalities. Identifying and resetting these switches can resolve the issue of the AC unit not turning on.
Safety Switch Location
- Locate the safety switch, often near the condenser unit or air handler. Refer to your AC unit’s manual for its specific location and contact HVAC technicians when needed.
- If the safety switch has tripped, reset it by pressing the reset button. This action can restore normal operation.
External Environmental Factors
External elements such as extreme weather conditions or debris around the condenser unit can impact the AC unit’s performance.
Condenser Unit Inspection
- Check the area around the condenser unit for debris, leaves, or other obstructions. A clear space ensures proper airflow.
- During extreme weather conditions, wait for the weather to normalize before attempting to turn on the AC unit.
How To Maintain AC in Phoenix
Living in Phoenix, Arizona, with its scorching temperatures, makes a reliable and efficient air conditioning (AC) system essential for comfort. However, maintaining your AC unit is crucial to ensure it functions optimally and lasts longer. In this blog post, we will explore ten key factors to help you understand how to maintain AC systems effectively in the challenging climate of Phoenix.
1. Regular Air Filter Replacement
Ensuring a consistent flow of clean air is crucial for your AC unit’s efficiency. Dirty filters can obstruct airflow, making your system work harder and potentially leading to breakdowns. Replace your air filters every 1-3 months, depending on usage and the type of filter.
2. Adequate Insulation and Sealing
Proper insulation and sealing in your home help in retaining cool air, reducing the workload on your AC system. Inspect windows and doors for any gaps, and use weather stripping to seal them. Additionally, consider upgrading insulation in attics and walls to prevent heat from infiltrating your home.
3. Efficient Thermostat Usage
Optimizing your thermostat settings can significantly impact your AC’s efficiency. Set the thermostat to a higher temperature when you’re away and lower it when you’re at home. Consider investing in a programmable thermostat to automate temperature adjustments, helping your system work efficiently without unnecessary strain.
4. Regular Professional Maintenance
Schedule professional AC maintenance at least once a year, preferably before the peak summer months in Phoenix. Trained HVAC technicians can identify and address potential issues, clean components, and ensure optimal performance. Regular maintenance not only extends the lifespan of your AC unit but also improves its energy efficiency.
5. Keep the Outdoor Unit Clean
The outdoor unit of your AC system is exposed to the elements and can accumulate dirt, debris, and vegetation. Regularly clean the surrounding area, removing any obstructions that could hinder airflow. Trim vegetation to maintain a clear space around the unit, allowing it to expel heat efficiently.
6. Monitor Refrigerant Levels
Adequate refrigerant levels are crucial for your AC system’s cooling efficiency. Low refrigerant levels can lead to poor performance and potential damage to the compressor. If you notice decreased cooling capacity or ice buildup on the evaporator coils, consult an HVAC technician to inspect and recharge refrigerant levels.
7. Check and Clean Ductwork
Leaky or dirty ducts can compromise the efficiency of your AC system. Inspect ductwork for any leaks, gaps, or blockages. Seal any leaks with duct tape or mastic sealant, and clean ducts periodically to remove dust and debris. This ensures that cool air reaches every part of your home efficiently.
8. Invest in Shade for the Outdoor Unit
Providing shade for the outdoor unit can help reduce its workload, especially during the intense Phoenix heat. Consider installing a canopy, awning, or planting tall shrubs around the unit to shield it from direct sunlight. This simple measure can significantly improve the efficiency and lifespan of your AC system.
9. Upgrade to Energy-Efficient Equipment
If your AC unit is outdated, upgrading to a more energy-efficient model can lead to substantial savings on your energy bills. Look for units with a high SEER (Seasonal Energy Efficiency Ratio) rating, as they are designed to provide better cooling performance with lower energy consumption.
10. Be Mindful of Indoor Heat Sources
Appliances, electronics, and lighting fixtures can contribute to indoor heat, making your AC work harder. Be mindful of these heat sources, especially during the hottest parts of the day. Consider using heat-generating appliances in the evening or early morning to minimize the impact on your AC system.
Conclusion
Troubleshooting an AC unit that refuses to turn on requires a systematic approach. By examining power supply issues, thermostat troubles, air filter obstructions, capacitor concerns, electrical connection problems, refrigerant levels, contactor issues, overheating concerns, malfunctioning compressors, and sensor problems, you can identify and address the root cause of the problem. If you encounter challenges or are unsure about any aspect of the troubleshooting process, it is always advisable to seek the expertise of a qualified HVAC professional from Einstein Heating and Cooling. Remember, a well-maintained AC unit is key to a cool and comfortable indoor environment.
