As winter approaches and temperatures plummet, a reliable furnace becomes the heart of your Bend home, providing warmth and comfort. However, when your furnace fails to produce heat, it can leave you feeling cold and frustrated. In this blog post, we’ll walk you through a comprehensive step-by-step procedure for furnace repair. Additionally, we’ll explore warning signs that indicate your furnace needs professional attention.
1. Investigate the Thermostat Setting
- Confirm that your thermostat is set to the desired temperature. It might seem obvious, but sometimes a simple adjustment is all that’s needed.
- Check the thermostat mode; it should be set to heating. If it’s set to cooling or off, your furnace won’t engage.
- For thermostats with batteries, replace them. Low batteries can disrupt communication and hinder proper functioning.
- Consider the placement of your furnace thermostat. It should be situated away from heat sources, drafts, and direct sunlight, as these factors can influence its temperature readings and affect its performance.
- Incorporate regular thermostat maintenance into your routine. Clean the thermostat to remove dust and debris that could impact its sensors.
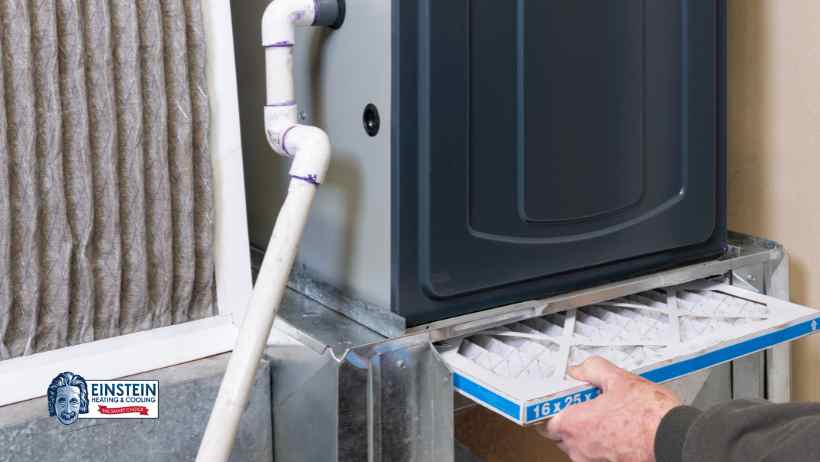
2. Assess the Air Filter
- A clogged or dirty air filter can severely restrict airflow, causing the furnace to overheat and shut down.
- Regularly replace the air filter as recommended by the manufacturer. This helps maintain efficient heating and prevents unnecessary strain on the system.
How to Inspect and Replace the Air Filter:
Begin by locating the furnace air filter. This is typically situated near the return air duct or within the furnace itself. Here’s a step-by-step process for inspection and replacement:
- Turn Off the Furnace:
Before inspecting or replacing the air filter, turn off the furnace. This ensures your safety during the process.
- Locate the Air Filter:
Find the air filter housing, which is usually near the furnace blower or inside the return air duct. Refer to your furnace manual if you’re unsure about its location.
- Remove the Old Filter:
Carefully slide out the existing air filter. Take note of the direction the filter is installed; there is usually an arrow indicating the airflow direction.
- Inspect the Filter:
Examine the condition of the old filter. If it’s visibly dirty or clogged, it’s time for a replacement. Hold it up to the light; if light doesn’t pass through easily, the filter is obstructed.
- Select a New Filter:
Choose a replacement filter that matches the dimensions and specifications recommended by the furnace manufacturer. Filters are available in various MERV (Minimum Efficiency Reporting Value) ratings; choose one that aligns with your furnace’s requirements.
- Install the New Filter:
Slide the new filter into place, ensuring it follows the indicated airflow direction. It’s crucial to install the filter correctly to allow for optimal air circulation.
- Turn On the Furnace:
Once the new filter is securely in place, turn the furnace back on. Monitor its operation to ensure it’s producing heat efficiently.
3. Examine the Circuit Breaker
- Inspect your circuit breaker box for any tripped breakers related to the furnace. Reset them to the “on” position.
- If the breaker continues to trip, it may indicate an electrical issue that requires professional attention.
Potential Causes of Tripped Breakers:
- Overloaded Circuit:
An overloaded circuit occurs when the electrical load surpasses the circuit’s capacity. This can happen if multiple high-power appliances are running on the same circuit. Consider redistributing appliances to different circuits to prevent overloads.
- Short Circuit:
A short circuit occurs when hot and neutral wires come into direct contact. This can happen due to damaged wiring or faulty electrical components. If you suspect a short circuit, consult with an electrician to address the issue promptly.
- Ground Fault:
Ground faults happen when a hot wire comes into contact with a ground wire or a grounded part of the electrical system. This can occur in wet or damp conditions. Identifying and resolving ground faults is crucial for preventing electrical hazards.
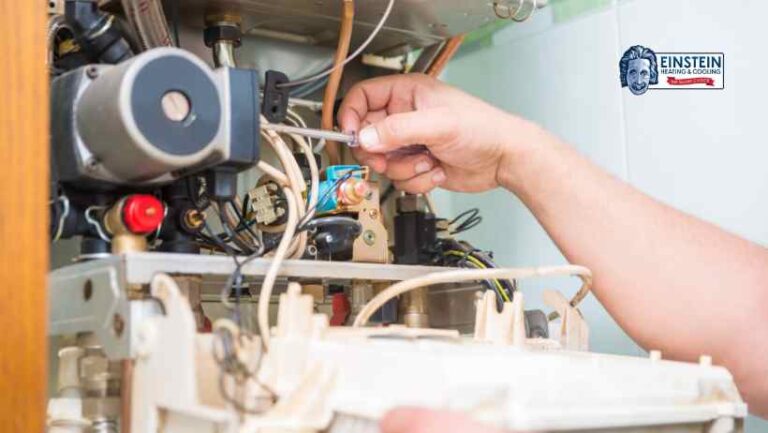
4. Check the Pilot Light
- For gas furnaces, locate the pilot light. It should emit a steady, blue flame.
- If the pilot light is out, consult your furnace’s manual for instructions on relighting it. If it won’t stay lit, there may be an issue with the thermocouple or gas supply.
How to assess the pilot light
- Locating the Pilot Light:
Begin by locating the pilot light. In most gas furnaces, you can find it near the burner assembly. Refer to your furnace manual for guidance on the exact location of the pilot light.
- Checking the Pilot Light’s Status:
Once you’ve located the pilot light, visually inspect it. The pilot light should emit a steady, blue flame. A weak or flickering flame, or no flame at all, indicates a problem that needs attention.
- Relighting the Pilot Light:
If the pilot light is out, consult your furnace’s manual for instructions on relighting it. The process typically involves turning the gas valve to the pilot position, holding down the reset button, and igniting the pilot light using a long lighter or match.
- Ensuring the Pilot Light Stays Lit:
After relighting the pilot light, observe it for a few minutes to ensure it stays lit. If it goes out again immediately or shortly after, there may be an issue with the thermocouple or gas supply.
- Inspecting the Thermocouple:
The thermocouple is a safety device that senses the pilot light’s heat. If the thermocouple doesn’t detect heat, it shuts off the gas supply to prevent gas leaks. Inspect the thermocouple for signs of wear or damage. If it appears faulty, it may need to be replaced by a qualified technician.
- Ensuring Proper Gas Supply:
Confirm that the gas supply to the furnace is turned on. A closed gas valve will prevent the pilot light from igniting. If you suspect a gas leak, evacuate your home immediately and contact your gas utility provider.
Potential Issues with the Pilot Light:
- Dirty or Clogged Pilot Orifice:
Over time, the pilot orifice can become dirty or clogged with debris, affecting the flame. Cleaning the orifice with compressed air can often resolve this issue.
- Faulty Thermocouple:
If the thermocouple is malfunctioning, it may not generate the necessary electrical voltage to keep the gas valve open. Thermocouple replacement by a professional may be necessary.
- Gas Supply Issues:
Problems with the gas supply, such as a closed valve or gas leak, can prevent the pilot light from igniting. Addressing these issues promptly is crucial for safety.
5. Ensure Proper Ventilation
- Confirm that all vents and registers are open and unobstructed. Blocked vents can impede airflow and affect heating efficiency.
- Check air ducts for blockages and clear any obstacles. This ensures proper circulation of warm air throughout your home.
6. Examine the Ignition System
- Make sure you get professional furnace installation to avoid problems in the ignition system. The ignition system in a furnace is responsible for initiating the combustion process, igniting the gas to produce heat. If your furnace isn’t producing heat, examining the ignition system is a crucial step in the troubleshooting process.
- Refer to the furnace manual for guidance on troubleshooting ignition problems. If unsure, seek professional assistance.
Types of Ignition Systems:
- Standing Pilot:
In furnaces with a standing pilot, a small, continuously burning flame ignites the gas burners. If the pilot light is out or the flame is weak, it can lead to ignition failure.
- Electronic Ignition:
Newer furnaces often feature electronic ignition systems, which use electronic components to ignite the burners. There are two types: intermittent pilot and hot surface ignition. Issues with electronic components can disrupt the ignition process.
Steps to Examine the Ignition System:
- Access the Furnace Panel:
Turn off the power to the furnace and locate the access panel. This panel is typically near the bottom of the furnace and can be removed by loosening the screws.
- Inspect the Pilot Light (if applicable):
For furnaces with a standing pilot, check the pilot light. It should be burning a steady, blue flame. If the flame is weak or out, follow the manufacturer’s instructions to relight it. If it won’t stay lit, there may be an issue with the thermocouple or gas supply.
- Check for Error Codes (if electronic ignition):
If your furnace has an electronic ignition system, look for error codes or indicator lights. These codes can provide valuable information about the nature of the problem. Refer to the furnace manual to interpret the codes and take appropriate action.
- Inspect Ignition Components:
Carefully inspect the ignition components for signs of wear, corrosion, or damage. These components may include the igniter, flame sensor, and control board. If any part appears faulty, it may need to be replaced by a qualified HVAC technician in Bend.
- Clean the Igniter (if applicable):
In furnaces with a hot surface ignition system, the igniter can become dirty or covered in soot, affecting its performance. Gently clean the igniter using a soft brush. Avoid touching the igniter with your hands, as oil from your skin can damage it.
Common Issues with the Ignition System:
- Failed Igniter:
The igniter is a crucial component in electronic ignition systems. If it fails to heat up, the gas won’t ignite. Replacing a faulty igniter can often resolve the issue.
- Dirty or Faulty Flame Sensor:
The flame sensor detects the presence of a flame. If it’s dirty or malfunctioning, it may shut off the gas supply. Cleaning or replacing the flame sensor is a potential solution.
- Control Board Malfunction:
The control board oversees the operation of various furnace components, including the ignition system. If it malfunctions, it can disrupt the ignition process. Professional evaluation and replacement may be necessary.
7. Verify the Gas Supply for Furnace Repair
- Ensure the gas supply to the furnace is turned on. A closed gas valve will prevent the furnace from igniting.
- If you detect the smell of gas or hear hissing, evacuate your home immediately and contact your gas utility provider. Gas leaks are hazardous and require immediate attention.
8. Inspect the Thermocouple
- For gas furnaces, inspect the thermocouple for signs of wear or damage. The thermocouple is a safety device that shuts off the gas supply in case of a malfunction.
- If the thermocouple is faulty, consult with a licensed technician for replacement.
Steps to Inspect the Thermocouple:
- Locate the Thermocouple:
The thermocouple is a small, metallic device located near the pilot light. It is connected to the gas valve and typically positioned to be in the path of the pilot light’s flame.
- Visual Inspection:
Perform a visual inspection of the thermocouple. Look for any signs of wear, corrosion, or damage. A damaged thermocouple may not generate the necessary electrical voltage to keep the gas valve open.
- Clean the Thermocouple:
If the thermocouple appears dirty or covered in soot, use a soft brush to gently clean it. Ensure that the cleaning is thorough but gentle to avoid causing damage to this sensitive component.
- Check the Thermocouple Connection:
Ensure that the thermocouple is securely connected to both the pilot assembly and the gas valve. Loose connections can disrupt the signal transmission, leading to malfunctions.
- Inspect for Proper Flame Interaction:
While the furnace is running, observe the pilot light’s flame. The thermocouple should be positioned within the flame. If the flame isn’t making direct contact with the thermocouple, it may not generate sufficient voltage.
9. Consider the Pressure Switch
- Check the pressure switch for proper functioning. This safety device ensures the furnace doesn’t operate if there are ventilation issues.
- A malfunctioning pressure switch may require professional assessment and potential replacement.
10. Warning Signs Your Furnace Needs Repair
- Strange Noises: Unusual sounds like banging, popping, or squealing may indicate mechanical issues.
- Uneven Heating: If certain rooms are significantly colder than others, your furnace may need attention.
- Increased Energy Bills: A sudden spike in energy costs could be a sign of an inefficient furnace.
- Frequent Cycling: If your furnace is turning on and off more frequently than usual, it may be struggling to maintain the set temperature.
- Visible Wear and Tear: Inspect your furnace for signs of rust, corrosion, or other visible damage.
Seeking Professional Help
If, after diligently following these furnace repair tips, your furnace is still not working, it’s crucial to consult with a qualified HVAC professional in Bend. Attempting complex repairs without the necessary expertise can lead to further complications or safety hazards. Prioritize safety and seek professional assistance for a thorough evaluation and lasting solutions to your furnace troubles.
In conclusion
By incorporating regular maintenance practices and staying vigilant for warning signs, you not only address current problems but also contribute to the overall efficiency and safety of your heating system. If uncertainties persist or if tasks seem beyond your comfort level, don’t hesitate to enlist the expertise of qualified professionals from Einstein Heating and Cooling. A well-maintained furnace ensures not only a warm home but also peace of mind throughout the winter months.