When you start searching for solutions to “AC heater not working,” it can be frustrating and uncomfortable, especially during extreme weather conditions in Phoenix, Arizona. However, before you call a professional technician, there are several factors you can investigate and potentially repair yourself. In this comprehensive guide, we’ll explore the common mechanical parts of an AC heater system that may stop working and provide step-by-step instructions on how to diagnose and repair the issues. Whether you have a central HVAC system or a window AC unit, these troubleshooting tips and DIY repair techniques can help you save time and money.
1. Faulty Thermostat
- Check the thermostat settings: If your AC heater is not working properly, the first step is to examine your thermostat. Ensure it’s set to the desired temperature and mode (heating or cooling). Sometimes, accidental adjustments can cause the system to malfunction.
- Replace the thermostat batteries: Many thermostats are battery-powered. If the display is blank or hard to read, it might be due to dead batteries. Replace them and check if the thermostat starts working correctly.
- Clean the thermostat sensor: Dust and dirt can accumulate on the thermostat’s sensor, affecting its accuracy. Gently clean the sensor with a soft brush or compressed air to ensure it can detect temperature changes accurately.
- Calibrate the thermostat: Some thermostats allow you to calibrate the temperature reading. Refer to the user manual to perform a calibration if you suspect that the displayed temperature is inaccurate.
- Upgrade to a programmable thermostat: If your thermostat is old or lacks features like programmability, consider upgrading to a programmable or smart thermostat. These devices can improve energy efficiency and make temperature control more convenient.
2. Dirty Air Filters
- Locate and access the air filter: Air filters are typically located in the return air duct or near the air handler. Consult your HVAC system’s manual or a professional if you are unsure about the filter’s location.
- Inspect the filter for dirt and debris: Remove the air filter and visually inspect it. If it’s clogged with dust, pet hair, or debris, it needs cleaning or replacement.
- Clean or replace the air filter: If the air filter is reusable, clean it according to the manufacturer’s instructions. For disposable filters, replace them with a new one that matches the system’s specifications.
- Set a regular maintenance schedule: To prevent future issues related to dirty air filters, establish a regular maintenance schedule. Check and clean or replace the air filter every one to three months, depending on usage and filter type.
3. Clogged or Blocked Air Vents
- Identify blocked vents in your home: Walk through your home and inspect each room’s air vents. Make sure they are not obstructed by furniture, drapes, or other objects.
- Remove obstacles blocking the vents: If you find obstructions, move them away from the vents to allow proper airflow.
- Clean and dust the vents: Over time, vents can accumulate dust and dirt. Clean them with a vacuum cleaner or a damp cloth to ensure unobstructed airflow.
- Balance the air distribution: Sometimes, certain rooms receive more airflow than others. Adjust the vent dampers, if available, to balance the distribution of warm or cool air throughout your home.
4. Frozen Evaporator Coil
- Determine if the evaporator coil is frozen: When your AC heater system is not heating or cooling effectively, inspect the indoor unit’s evaporator coil. If it’s covered in ice, it’s likely the cause of the problem.
- Turn off the AC heater system: To address a frozen evaporator coil, turn off the system immediately. Continuing to run it can lead to more serious issues.
- Thaw the coil by turning on the fan: Allow the fan to run without the heating or cooling mode. This will help melt the ice on the coil. This process may take a few hours.
- Prevent future freezing: To prevent the evaporator coil from freezing again, ensure proper airflow by keeping filters clean, checking for ductwork leaks, and maintaining adequate refrigerant levels. If the issue persists, consult a professional technician from Einstein Heating and Cooling.
5. Refrigerant Issues
- Detect signs of low refrigerant levels: Low refrigerant levels can affect the AC heater’s performance. Signs of this issue include reduced cooling or heating, hissing sounds, or ice on the refrigerant lines.
- Don’t attempt to add refrigerant yourself: Adding refrigerant to your system is a job for a qualified HVAC technician. Refrigerant handling requires specialized equipment and knowledge. Attempting to do it yourself can lead to further problems and safety hazards.
- Schedule a professional inspection and recharge: If you suspect a refrigerant issue, contact a professional technician to diagnose the problem, repair any leaks, and recharge the system with the correct refrigerant. This will ensure optimal performance and prevent future AC heater not working problems.
6. Malfunctioning Blower Fan
- Check if the blower fan is running: The blower fan is responsible for circulating warm or cool air throughout your home. If it’s not running, the system won’t distribute air properly.
- Inspect the fan for obstructions: Occasionally, the blower fan can get obstructed by debris or dust. Check the fan for any obstacles and remove them carefully.
- Replace a faulty blower motor: If the blower fan still doesn’t work after removing obstructions and ensuring power is reaching the motor, you may need to replace the blower motor. This is typically a job for a professional technician.
- Lubricate the blower motor if necessary: Some blower motors require lubrication to function correctly. Consult your system’s manual or a professional technician to determine if lubrication is necessary.
7. Faulty Capacitors
- Identify the start and run capacitors: The capacitors are responsible for starting and running the compressor and the fan motor. They can sometimes fail.
- Test capacitors with a multimeter: If you suspect a capacitor issue, you can test them with a multimeter. A capacitor with zero resistance or one that doesn’t hold a charge needs replacement.
- Replace capacitors if they are faulty: Faulty capacitors should be replaced with components that match the system’s specifications. Capacitors are typically inexpensive and readily available.
- Ensure proper installation: When replacing capacitors, it’s crucial to ensure proper installation. Connect them according to the wiring diagram on the unit or consult a professional technician.
8. Defective Heating Elements
- Inspect the heating elements: For electric AC heaters, the heating elements are critical for generating warm air. Check these elements for visible signs of damage or wear.
- Check for continuity with a multimeter: Use a multimeter to check the continuity of the heating elements. If they don’t have continuity, they need replacement.
- Replace faulty heating elements: If the heating elements are defective, replace them with elements that match the manufacturer’s specifications for your system.
9. Electrical Issues
- Inspect the circuit breaker and fuses: A tripped circuit breaker or blown fuses can disrupt the power supply to your AC heater. Check the electrical panel to see if this is the issue.
- Reset the breaker or replace fuses: If the circuit breaker has tripped, reset it. If fuses have blown, replace them with new ones of the same rating.
- Check for loose connections: Loose electrical connections can cause various problems. Inspect the wiring and connections within the system and tighten any loose connections.
- Call an electrician for complex electrical problems: If you encounter complex electrical issues that you can’t diagnose or fix, it’s wise to contact a licensed electrician to ensure your system operates safely and efficiently.
10. Damaged or Worn Fan Belt
- Locate the fan belt in the blower compartment: Fan belts are commonly found in older HVAC systems with a belt-driven blower motor. Locate the fan belt in the blower compartment.
- Check for signs of wear or damage: Examine the fan belt for any visible signs of wear, cracking, or fraying. If the belt is in poor condition, it should be replaced.
- Replace a worn-out fan belt: To replace a worn or damaged fan belt, measure its length and purchase a new belt with the same specifications. Follow the manufacturer’s guidelines for proper installation.
- Adjust the tension properly: After replacing the fan belt, ensure that it is properly tensioned. An overly tight or loose belt can lead to issues. Consult your system’s manual or a professional technician for guidance on proper tension adjustment.
11. Blocked Condensate Drain
- Identify the condensate drain: The condensate drain is responsible for removing excess moisture produced by the AC heater. Over time, it can become clogged, leading to issues.
- Unclog the drain using a stiff wire or vacuum: To unclog the condensate drain, use a stiff wire or a wet/dry vacuum. Gently clear any debris that may be obstructing the drainage path.
- Install a condensate drain pan overflow switch: To prevent future condensate drain blockages and potential water damage, consider installing a condensate drain pan overflow switch. This device can shut down the system if the drain becomes blocked or overflows, alerting you to the issues.
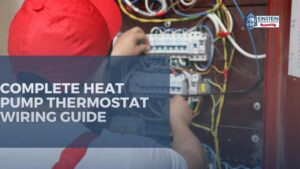
12. Thermostat Wiring Issues
- Examine the thermostat wiring: Sometimes, thermostat wiring can become loose or disconnected, leading to communication problems with the HVAC system. Inspect the wiring for any issues.
- Reconnect loose or disconnected wires: If you find loose or disconnected wires, carefully reconnect them to their proper terminals following the wiring diagram in your system’s manual.
- Replace damaged wires: If any wires are damaged or frayed, it’s essential to replace them with new ones that match the system’s specifications. Use the appropriate wire connectors and follow manufacturer guidelines.
- Ensure correct wiring color-coding: Be sure to use the correct color-coding for thermostat wires when reconnecting or replacing them. This ensures that the system communicates effectively with the thermostat.
13. Pilot Light Problems (Gas Heaters)
- Verify if your heater uses a pilot light: Gas heaters often use a pilot light to ignite the burner. Check if your system has a pilot light that may have gone out.
- Relight the pilot light if it’s out: Carefully follow the manufacturer’s instructions for relighting the pilot light. Use a long lighter or match, and if the pilot light remains lit, your heating system should work correctly.
- Clean the pilot assembly: Over time, the pilot assembly can accumulate dirt or soot, affecting its performance. Turn off the system and clean the pilot assembly carefully. Be sure to follow safety guidelines and the manufacturer’s recommendations.
- Replace the thermocouple if necessary: If the pilot light won’t stay lit, the thermocouple may be faulty. Replacing the thermocouple is a job for a professional technician to ensure it’s done correctly.
14. Flame Sensor Issues (Gas Heaters)
- Locate the flame sensor: Gas heaters are equipped with a flame sensor that detects the presence of a flame. It ensures that the gas valve remains open.
- Clean the flame sensor: A dirty or corroded flame sensor may fail to detect the flame, causing the system to shut down. Gently clean the sensor using emery cloth or fine sandpaper.
- Test the sensor with a multimeter: Use a multimeter to test the flame sensor’s continuity. If it fails to register continuity, it may need replacement.
- Replace the sensor if it’s faulty: If cleaning or testing doesn’t resolve the issue, consider replacing the flame sensor with a new one that matches the system’s specifications.
15. Inadequate Maintenance
- Create a regular maintenance schedule: Preventive maintenance is essential to keep your AC heater in good working condition. Create a schedule for regular maintenance, including cleaning, inspections, and minor repairs.
- Clean and lubricate moving parts: Regularly clean and lubricate moving parts such as bearings and motors. This can extend the lifespan of these components and reduce the risk of breakdowns.
- Schedule professional inspections: While DIY maintenance is valuable, it’s also important to schedule professional HVAC inspections at least once a year. A technician can identify and address potential issues that may not be obvious to the homeowner.
- Replace worn components preemptively: If a professional technician recommends replacing certain components due to wear or impending failure, it’s wise to follow their advice. Replacing parts before they fail can save you from more extensive and costly repairs in the future.
16. Ductwork Leaks and Insulation
- Inspect the ductwork for leaks: Leaky ducts can lead to energy loss and uneven heating or cooling. Inspect your ductwork for visible gaps, disconnected sections, or damaged insulation.
- Seal ductwork leaks with mastic or tape: If you find leaks in the ductwork, use specialized duct mastic or tape to seal them. This helps maintain efficient airflow and temperature distribution.
- Ensure proper insulation: Proper insulation of ducts is crucial for preventing heat loss or gain. Make sure the ducts are adequately insulated to maintain the desired indoor temperature.
- Consider professional duct sealing: If you have extensive or hard-to-reach ductwork, consider hiring a professional to perform a thorough duct sealing. They can identify and address issues that may not be visible to the average homeowner.
17. Air Handler and Heat Exchanger Inspection
- Examine the air handler for issues: The air handler is responsible for circulating air through your HVAC system. If it’s not functioning correctly, it can affect the entire system.
- Inspect the heat exchanger for cracks: In gas furnaces, the heat exchanger can develop cracks over time, which can be a safety hazard. Inspect it for any visible cracks or signs of damage.
- Address problems with professional assistance: If you identify issues with the air handler or heat exchanger, it’s advisable to contact a professional HVAC technician. They have the expertise to diagnose and repair these components safely and effectively.
- Consider replacing a damaged heat exchanger: If the heat exchanger is severely damaged or has safety concerns, it may be more cost-effective and safe to replace the entire furnace rather than attempting repairs.
Conclusion
AC heater mechanical parts not working can be frustrating, but with the knowledge and skills provided in this guide, you can diagnose and address many common issues yourself. Regular maintenance and proactive problem-solving are key to keeping your HVAC system in optimal condition. However, remember that safety should always be a top priority. For complex issues or if you’re unsure about any repair, don’t hesitate to seek professional assistance from Einstein Heating and Cooling. By following these steps and maintaining your system, you can ensure a comfortable and efficient environment in your home throughout the year.