Tankless water heaters play a pivotal role in your home’s HVAC (Heating, Ventilation, and Air Conditioning) system, offering the convenience of efficient and on-demand hot water. To uphold their peak performance and prolong their operational life, it’s imperative to carry out regular maintenance. In this do-it-yourself (DIY) guide, we’ll take you through four straightforward steps for flushing your tankless water heater. By following these steps, you can ensure that your tankless water heater continues to operate flawlessly for homeowners in Prineville.
Step 1: Gather Your Tools and Materials
Prior to initiating the flushing process, it’s essential to have all the required tools and materials at your disposal. Here’s a list of what you’ll need:
Tools:
- Screwdriver
- Bucket or drain pan
- Hose
- Pipe wrench
Materials:
- Vinegar or a commercial descaling solution
- Clean cloth or towel
Having these items ready and within reach will not only save you time but also ensure that the maintenance of your tankless water heater proceeds smoothly.
Step 2: Turn Off the Power and Gas Supply
Safety should always be your paramount concern when dealing with any component of your HVAC system, including your tankless water heater. To avert accidents or potential damage, adhere to these guidelines:
1. Disconnect the Power:
- Locate the electrical breaker or disconnect switch that controls your tankless water heater.
- Switch it off to completely cut off the power supply.
2. Shut Off the Gas Supply:
- Find the gas shut-off valve connected to the gas line that supplies your tankless water heater.
- Turn the valve to the “off” position.
Step 3: Isolate the Water Supply
In order to prevent any water from entering your tankless water heater during the flushing process, follow these steps:
1. Locate the Water Isolation Valves:
- Your tankless water heater is equipped with two isolation valves, one on the hot water side and one on the cold water side.
- Rotate both valves to the “off” position to halt the flow of water.
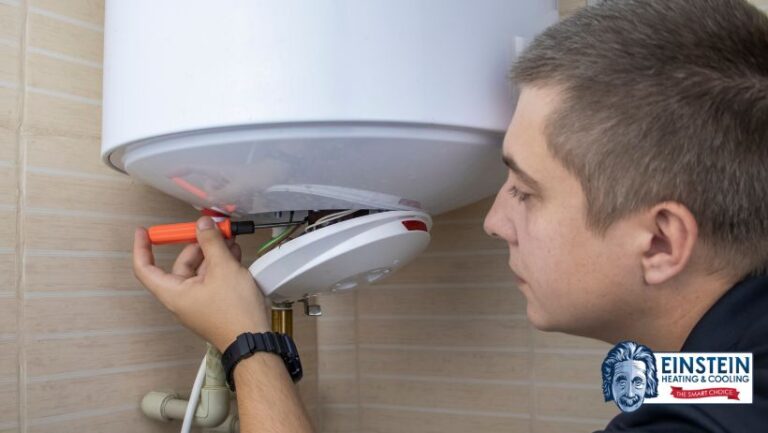
Step 4: Drain and Flush Your Tankless Water Heater
Once you have safely prepared your tankless water heater for maintenance, it’s time to dive into the crucial step of draining and flushing the system. This process is vital for eliminating any scale or mineral buildup that can accumulate over time and hinder the efficient operation of your heater.
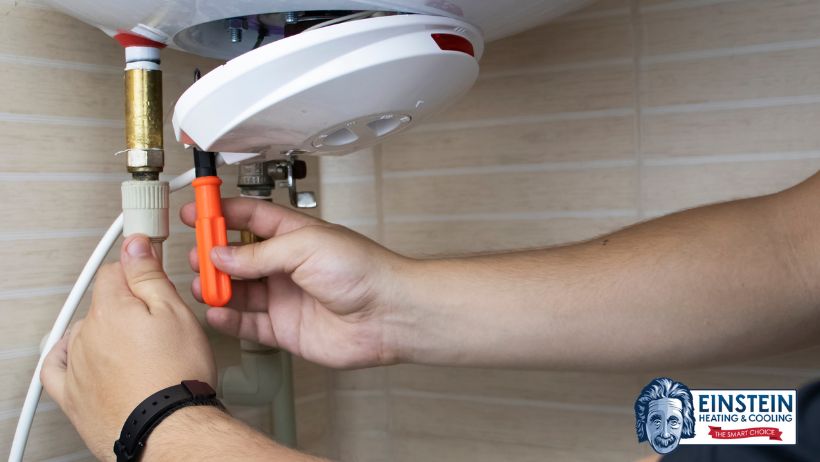
1. Attach a Hose:
Start by connecting one end of a hose to the drain valve located at the bottom of your tankless water heater. This hose will act as the conduit through which the water and flushing solution will exit the system. Make sure it’s securely fastened to prevent any leaks.
2. Direct the Hose:
Now, position the other end of the hose over a suitable drainage point, such as a floor drain or a large bucket. The water and flushing solution that will flow out of the heater need a proper disposal route, and this step ensures a mess-free and efficient process.
3. Open the Drain Valve:
With the hose in place, gently open the drain valve on your tankless water heater. This valve is typically located at the bottom of the unit. As you open the valve, water will begin to flow out of the heater and into the hose. This is the initial step in clearing out any sediment or mineral deposits that may have accumulated inside.
4. Prepare the Flushing Solution:
To effectively flush your tankless water heater, you’ll need to create a flushing solution. There are two common options for this:
a. Vinegar and Water Solution:
- Mix equal parts of white vinegar and water in a roughly 50/50 ratio. Vinegar is an effective natural descaler that can help dissolve mineral deposits.
b. Commercial Descaling Solution:
- Alternatively, you can use a commercial descaling solution specifically designed for tankless water heaters. Ensure that you follow the manufacturer’s guidelines for the correct dilution and usage.
5. Inject the Solution:
To introduce the flushing solution into your tankless water heater, you have a couple of options:
a. Submersible Pump:
- Using a submersible pump is one of the most efficient ways to inject the solution. Simply place the pump into a container filled with the flushing solution and connect it to the cold water inlet valve of your tankless water heater. Turn on the pump, and it will push the solution into the system.
b. Bucket Method:
- Alternatively, you can use a large bucket or container filled with the flushing solution. Place the bucket above the tankless water heater and use gravity to allow the solution to flow into the cold water inlet valve.
6. Allow It to Sit:
After successfully introducing the flushing solution into your tankless water heater, it’s essential to allow it to sit inside the heater for at least 45 minutes. This dwell time is crucial for the solution to dissolve and break down the scale and mineral deposits that have built up inside the unit. Patience during this step ensures an effective flushing process.
7. Drain the Solution:
Once the flushing solution has had sufficient time to work its magic, it’s time to remove it. To do this:
- Open the hot water isolation valve on your tankless water heater. This will allow the flushing solution to flow out of the heater through the same hose you’ve attached, carrying away the dissolved scale and mineral deposits with it.
8. Rinse the System:
To ensure that all traces of the descaling solution are completely removed from your tankless water heater, it’s essential to perform a thorough rinse. This step is crucial for the long-term performance and lifespan of your unit.
- Repeat the flushing process, this time using clean, fresh water. By introducing fresh water into the system, you ensure that there are no remnants of the descaling solution left behind, which could potentially harm the heater or affect the quality of your hot water.
9. Close the Drain Valve:
Once you’ve completed the rinsing process, gently close the drain valve on your tankless water heater. This step is essential to halt the flow of water and prevent any leaks or spillage.
By meticulously following these four steps and taking extra care during the flushing process, you’ll ensure that your tankless water heater functions optimally. This, in turn, guarantees that it delivers hot water on demand for homeowners in Prineville. Regular maintenance of your HVAC system, including your tankless water heater, is essential to prevent costly repairs and to keep it operating efficiently. Taking care of your tankless water heater is an investment in your home’s comfort, convenience, and energy efficiency. So, don’t wait any longer—provide your tankless water heater with the care it deserves today.
Turn On the Water Isolation Valves
With your tankless water heater now properly flushed and rinsed, it’s time to prepare it for regular operation. This involves reopening the water isolation valves to allow water to flow back into the unit. Here’s how to do it:
- Open the Hot Water Isolation Valve:
- Locate the hot water isolation valve, which is typically labeled as such and is on the hot water side of the heater.
- Carefully turn the valve to the “on” position, allowing water to flow into your tankless water heater.
- Open the Cold Water Isolation Valve:
- Similarly, find the cold water isolation valve, often labeled on the cold water side of the heater.
- Turn this valve to the “on” position as well. This will enable a continuous flow of cold water into the tankless water heater, which the unit will then heat as needed.
By reopening these isolation valves, you are restoring the water supply to your tankless water heater, making it ready to provide hot water on demand. This step signifies the completion of the flushing and maintenance process, ensuring that your tankless water heater is once again fully operational.
Conclusion
In the journey of maintaining your tankless water heater, these four fundamental steps are essential to ensuring that your HVAC system, including your tankless water heater, functions optimally, efficiently, and effectively. Other tankless water heater problems can be avoided if one invests in proper maintenance from professional plumbers. Regular maintenance is an investment in the performance and longevity of your tankless water heater, as well as a commitment to the comfort and convenience of your home in Prineville.
By following these steps, Prineville homeowners can rest assured that their tankless water heater will operate efficiently and deliver hot water on demand. Regular maintenance of your HVAC system is a crucial aspect of homeownership, as it not only prevents costly repairs but also ensures that your system performs at its best.
In summary, proper maintenance of your tankless water heater is indispensable for Prineville homes. By routinely flushing your tankless water heater and following these steps diligently, you can enjoy the benefits of efficient hot water and extend the life of this vital component of your HVAC system. Taking care of your tankless water heater is not only a practical choice but also a smart one, contributing to a comfortable and efficient home. So, don’t delay – give your tankless water heater the care and attention it deserves today, and it will continue to provide hot water whenever you need it.
Why Choose Einstein Heating and Cooling for Your Tankless Water Heater Needs
When it comes to addressing your HVAC needs, there’s no better choice than Einstein Heating and Cooling. Just as we’ve outlined the four easy steps to flush your tankless water heater for your Prineville home, Einstein Heating and Cooling demonstrates a commitment to excellence in maintaining and optimizing your HVAC system. With a team of skilled professionals and a reputation for reliability, Einstein Heating and Cooling offers a range of services to ensure your home’s comfort and energy efficiency. Whether it’s flushing your tankless water heater, conducting routine maintenance, or addressing any HVAC concerns, you can trust Einstein Heating and Cooling to provide top-notch service and expertise, helping you maintain a comfortable living environment while extending the lifespan of your HVAC equipment.